Installing Bathroom Tile
So you have everything ready and the tile looks right? Let's start
installing the tile.
You can do this two different ways:
1. You can pick up all the tiles numbering them in order to keep track
of where they go or
2. You can do as I did and just pull up a few at a time to keep my
spacing tight.
So, I picked a corner furthest from the doorway and
pulled up a few tiles and leaned or stacked them in order of how I
needed to put them back. I mixed some thinset and away I went!
Part of a proper installation is to mix the thinset
correctly and with even consistency. The best way is too use a drill
with a mixing paddle while adding the water and thinset into a bucket.
Only mix enough that you will use in a reasonable timeframe, always read
the directions on the packaging before you do any mixing. I am sure it
could be harmful to breath the dust so wear proper protection and gloves
while handling the thinset.
The thinset should be like a course lotion, not runny, but not
too thick. I probably was able to lay down about 8 to 10 tiles (13" x
13") at a time without it hardening in the bucket.
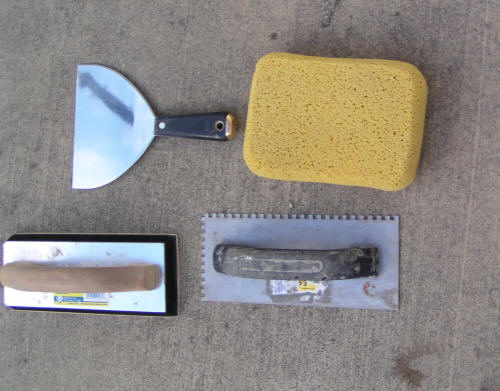
Pictured are some tools I used - putty knife, sponge, grout tool, and
notched trowel.
You will want some tools to use such as a rubber mallet, block
of wood (flat), some sort of thin pry bar, a wet rag, and maybe some
knee pads. The block of wood and rubber mallet are for setting the tile
on the thinset, I also used a little bit of weight to make sure the tile
was down and level. Make sure you keep each tile level and don't let the
thinset get thick or hard or that tile will not set as low as the prior
tile.
I used a thin pry bar to move a tile that I placed to
close to another and need to shift it to get the spacers in. The
pattern I used, the offset row pattern, needed to have a number of
spacers, and one way to keep them from getting stuck is to place them in
upright like a cross or t, instead of laying flat. If you are doing a
grid or diamond patter you will want to put then in the corners as a
plus sign. They have a little tool you can buy to pry these out with
after the thinset dries.
To apply the thinset find the right sized notched trowel for
the job. They recommend a different sized notch for different
applications, the notch is what determines the thickness of the thinset.
I also used a 6" putty knife to place a pile of thinset on the subfloor
and to get it close to the corners to start with since I am not a pro.
Now while the thinset dries stay off the tiles, any heavy
weight or shifting can cause a tile to end up being loose later. Read
the bag for the thinset to see how long to wait for it to dry.
Once you let it dry the recommended amount of time, then you
get to fill in the gaps with grout.
Next --> Applying grout
in tile floor